Advanced usage of A360 View and Data API
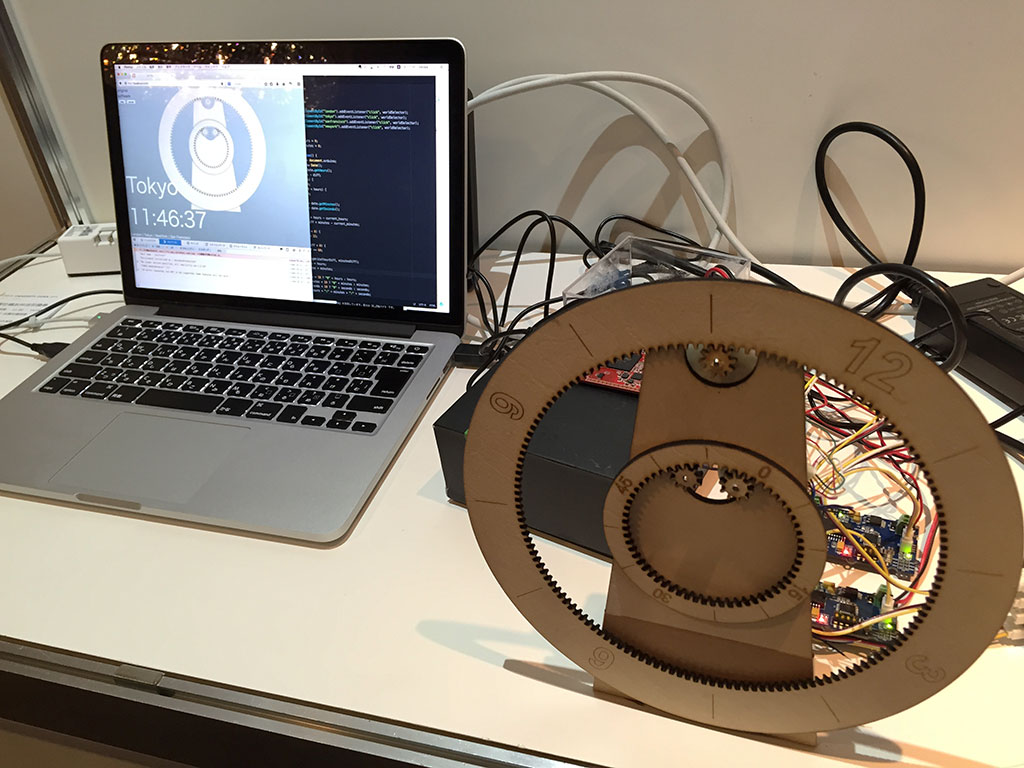
On Oct 9th 2015, the conference called Autodesk University Japan was held in Tokyo, and Akatuka-san who is working for Mozilla japan and I gave a talk about WoT using A360 View-and-Data-API, which is a Web service by Autodesk.

What is View and Data API?
First of all, I’m gonna explain what View and Data API is. Literally, it consists of 2 features, the temporary file storage and the viewer.
The storage accepts several 3D model file formats, such as CAD format, STL, DXF, OBJ, 3DS, DAE and many others. Then it hosts them.
The viewer can show 3D file which is hosted in the storage. The viewer was built on top of three.js and WebGL, done with 100% web standards technology, and no need any plugins.
Additionally, the storage and viewer are connected through WebSocket which is kinda secure streaming connection. Thanks to the connection, it is possible to show a high-poly 3D model, even under internet connection, and the original model file data can be hidden.
Get started
TL;DR, I’ve made a short video and you can just watch it! Most blog posts about the API by Autodesk people are working with Windows, but this time, I will do on Mac book. I hope this could be helpful for you.
Start from View and Data API Beta - Quick Start Guide. Example code is available on github https://github.com/yomotsu/get-started-with-a360-view-api
At that demo what I made for the conference, I added an animation feature which was supposed to sync with a physical clock device. Unfortunately it was not perfect at that time tho. Anyway applying basic animations is possible under the View API version 1.2.16.

How to apply animations
Basically, View API is a viewer for high poly 3D models, and not for interactive projects so far I think. However you can handle animations with basic transforms, such as translate, rotate and scale, via three.js way but quite different. To do so, I’m gonna share some tips.
How to detect loaded event
If you would like to apply an animation or even just a transform, your app has to wait for load to complete. To detect the timing, there is an event, called Autodesk.Viewing.GEOMETRY_LOADED_EVENT.
1 | var viewer = new Autodesk.Viewing.Viewer3D( viewerElement, {} ); |
How to translate
Use FragProxy feature to get kinda ghost of an actual mesh. Then apply transforms, and update it.
1 | // after loaded entire model... |
How to rotate
Similar to translate, but a little bit complicated. Because the viewer does not support local coords, and you have to use world coords instead. Plus fragProxy only accepts quaternion to rotate. When you would like to rotate a mesh in the model, follow the steps below.
The model is assumed to contain some meshes,
- Before upload the model to the storage, align all parts (meshes) to center of the bounding box which contain all the model, using your 3D modeler software. Because when the model is loaded into the viewer, the center of the bounding box will be the origin of the world coords. The would X, Y, Z axises will be the axis of rotation.
- And then, after loaded the entire model, just re-arrange each parts to the original position.
- If you would like to apply rotate animation, follow the steps
- Rotate a mesh using quaternion.
- Then move position to whatever you want to place.
e.g. to rotate 60 deg,
1 | // assume to the all parts (meshes) are aligned to center... |
How to animate it
Just render every frame like three.js way after you applied transform with above tips.
How to set the viewport size
After you make a viewer instance, set container size immediately.
1 | var viewer = new Autodesk.Viewing.Viewer3D( viewerElement, {} ); |
How to resize the viewport size whenever you want
Set container size and then, execute resize() method.
1 | viewer.container.style.width = '1000px'; |
The code of the the demo
At the end, I will attach the code for the demo. This is not connected to the clock device and works as a stand alone with animations.
HTML
1 | <link rel="stylesheet" href="https://developer.api.autodesk.com/viewingservice/v1/viewers/style.css"> |
JS
1 | ;( function () { |
get-token.php (replace XXX… and YYY… to your setting)
Actually, the code is very similar to the curl command what you saw at the first step, then this will return a token in JSON.
1 |
|